
How to Send Visitor Invites in Bulk with the Vizitor App

Ankur Rana
Thu, Oct 6, 2022
Read in 2 minutes
Step 1: Log In to Your Dashboard
Login to your Vizitor dashboard.
Step 2: Open the Invites Tab
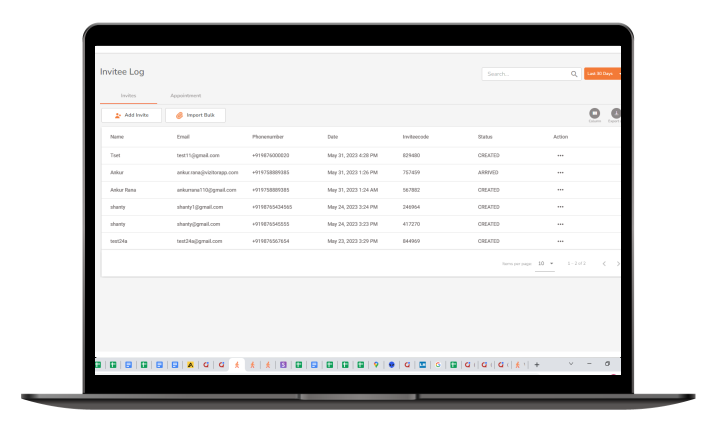
Click on the Invites tab from the left panel.
Step 3: Upload Your CSV File
Once you click on the bulk invite an import wizard will open. Asking you to upload a csv file. You’ll need to make sure that the file matches the syntex.
Once you initiate the process of sending bulk invites in Vizitor, you can take advantage of the convenient import wizard. By clicking on the “Bulk Invite” option, an import wizard will be launched, prompting you to upload a CSV file containing the necessary visitor information. It is crucial to ensure that the CSV file adheres to the specified syntax to ensure successful import. This typically involves organising the data in columns such as name, email address, phone number, purpose, and other relevant details.
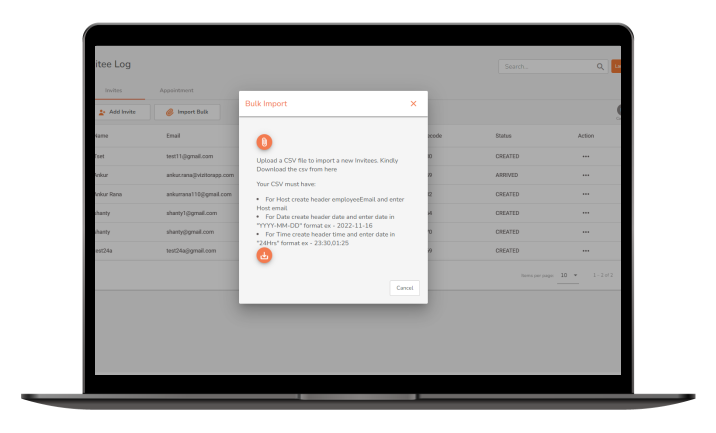
Carefully review the import instructions provided by Vizitor to understand the required format and ensure that your CSV file matches the syntax precisely. This helps avoid any potential errors or complications during the import process. By leveraging the bulk invite feature and utilizing the import wizard effectively, you can streamline the process of inviting multiple visitors simultaneously, saving time and effort while maintaining accuracy in your visitor management system within Vizitor.